Thursday, January 31, 2019

Marble paper

The next challenge in the group was to crunch up a thinner card stock into a ball, (she mentioned that copy paper didn't work very well, and you want your paper to be bigger than the piece you will use for your card) and then open it and crunch into a ball again the other way. Flatten it out, Ink up your paper with Distress oxide ink or other ink that won't dry quickly and place another card stock onto that paper, rub over the paper with your hand to transfer the ink onto your piece of card.  Do this 3 times using different colored inks and moving your paper each time so that the pattern won't be the same.

Your finished results with be a marbling effect.  This is how mine turned out. I will confess that I spritzed it with a bit of water to make the lines stand out they were a bit too thin for my taste.


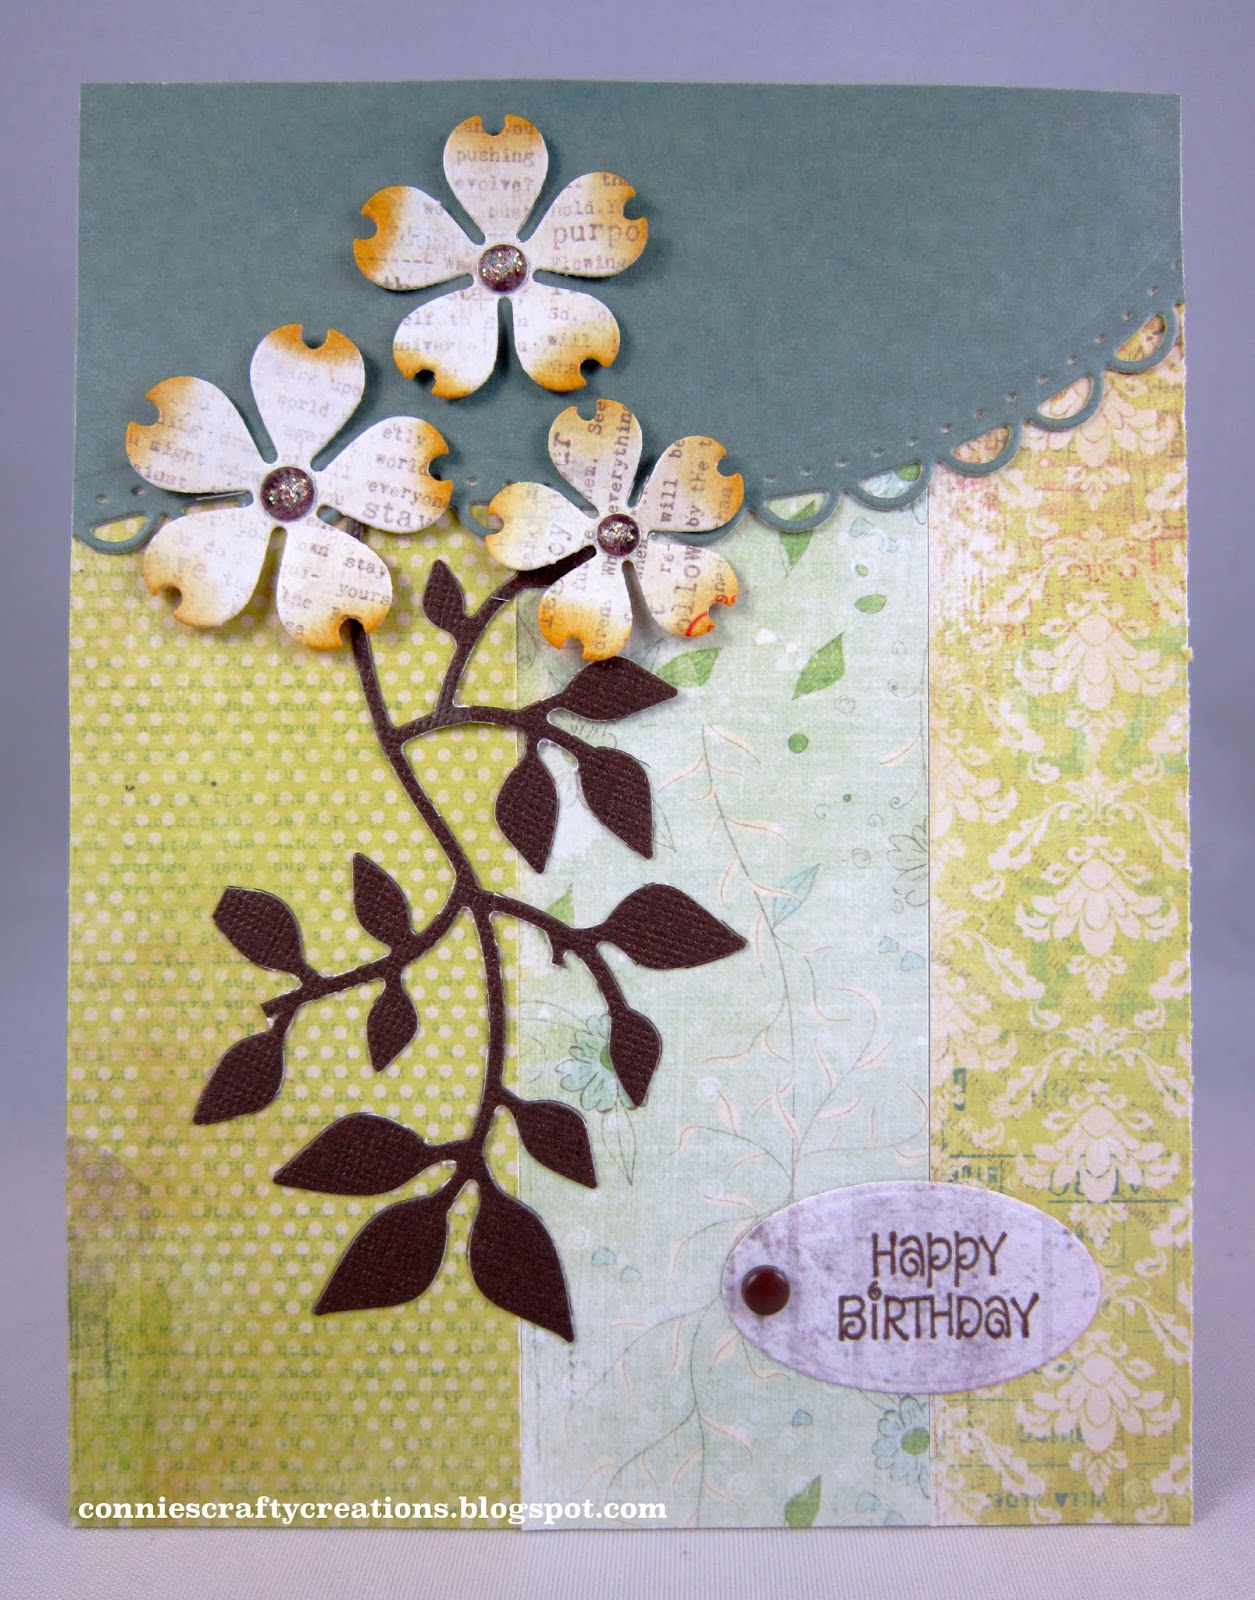
I think that really helped to make the lines pop a bit.  I stamped my flower on the card and using two of the inks I shaded around the edges.

Distress Oxides - Fossilized Amber, bundled sage and rusty hinge
Inkadinkado - Flower sentiment stamp set

These are pics of the backgrounds.


We were to make a card with the paper that we crunched too.


Distress Oxides - Fossilized Amber, bundled sage and rusty hinge
Spellbinders - A2 distressed edges and deckled rectangle dies
Artistic Outpost - The outpost stamp set, stamped with same inks as above
David Tutera - sentiment

I made another set of backgrounds but haven't had a chance to get them made into cards yet, this was an interesting technique.

Thanks so much for taking the time to stop in today, hope you are staying warm, another very cold night and morning today, but they say tomorrow we should get above freezing again!!

Thanks so much for taking the time to stop by,

Connie

Wednesday, January 30, 2019

Gift card holder

This challenge came at just the right time because I have a surprise birthday party to go to and they suggested a lot of different gift cards to give to the birthday man.

We went with the measurements and design you can find HERE.

This is the perfect size to fit a gift card.The girl in my group that had the challenge used a closure to keep it shut but I just put some removable adhesive on the inside to hold it shut, but will be easy to open.  On the flap you fold up from the bottom so that it will hold the card I added some washi tape.  I found this stamp that fit perfectly on the card and colored it with pencils and used mineral spirits to blend.


PSX - F-762 stamp, colored with pencils
Tim Holtz - Rose design tape
Technique Tuesday - Happy Birthday sentiment stamp


These little cards are great for using your smaller stamps and makes the giving of the gift card a bit more special!

We had a very frigid start to our morning but nothing like the people up north of us are having, wishing everyone in the cold areas stay warm today.

Thanks so much for stopping by,

Connie

Tuesday, January 29, 2019

Curtain Call

I have heard this fold called many things but in my group challenge she called it Curtain call.  The link I looked at that she provided I messed up the first card and cut the drape wrong, but I didn't think it looked to bad if you didn't know how it should look, LOL! So I made it anyway, another thing I did wrong was I used a coloring calendar image and I was supposed to use a stamp, so I had to make another card, this time I decided to use a butterfly all over print but once again cut it wrong and the butterflies would be upside down so I still had to use the green polka dot side of the paper as I used in my first card.

Here is a link to the measurements, I have spent the last 20 minutes trying to find the youtube I found since I am a visual learner and I can not find it.


I used a scrap piece for my background and to stamp the butterfly onto.  I don't know the maker of the butterfly it is a very old stamp and I threw away the packaging.  I think the sentiment is from a cardmaking magazine but there is no name on that either.

Echo park - Find and Dandy paper (green polka dot)
Butterfly and sentiment stamps, unknown
Recollection- Lace
Fashion bead paint - pink

I thought I would share my boo boo card.


 I guess it gave me more room for a bigger sentiment in the opening. I used a Cheerful Journey coloring calendar image and used markers on it.

Thanks so much for stopping by today, Hope your week is off to a good start,

Connie


Monday, January 28, 2019

Embossed Resist

Our stamp group is having a week of challenges and ever since I watched Jennifer McGruire's post HERE, I have been wanting to give it a try since I didn't know you could use Alcohol inks on anything but glossy surfaces, I kind of liked the matte finish it gave to this card.

I first embossed the tree and all the leaves with with embossing powder. I embossed on the smoother side of my watercolor paper for the main image and then embossed the extra leaves that I wanted to cut out and pop up on the rough side of another sheet of water color paper.  I will have to say I liked the outcome on the smoother side so was very glad I did the main images on that side, you really can't tell with the ones that I cut out.


I used 3 inks and a gold mixative, I must not have put my cap on tight enough last time on the mixative and it was dried up, I added some blending solution to it and it seemed to revive it just enough for me to get some out and add it to it, you can see it a little better on the side view.


Next time I would like to try it with some lighter colors and flowers, but I was in need of a masculine card so I went with this. There was a little more color left on the embossing than I liked so I put a little blending solution on a Q tip and went over the embossing lightly to remove some of the color.

Water color paper
Alcohol inks - Meadow, stream and Latte with gold mixative
Papertrey ink - Might Oak stamp w/ white embossing powder
Die Versions - celebrate die cut twice

Our week is starting off rainy and gloomy with very cold temps coming.  I can't really complain after seeing the temperatures that they will be getting north of us.

Thanks for taking the time to stop by today,

Connie

Saturday, January 26, 2019

Sketch challenge

My cardmaking group starting up their weekly sketch challenge and this week we are doing the Sweet Sunday sketch challenge #268.

I was limited on time so I used some flower stickers for my main image and a sticker for my sentiment.


Miss Elizabeth- pansies glitter sticker
Cardmaking and papercraft magazine papers.
Spellbinders - A2 matting basics A and Curved Rectangles die
SRM - thinking of you sentiment sticker
Gems

Wishing you a fun and creative weekend!
Thanks so much for taking the time to stop by and say Hi,

Connie

Friday, January 25, 2019

Christmas challenge

The Christmas challenge with my stamp group was to make cards starting with the letter A.  I went with angels except for my last card, and I just found this scrap piece of paper that I thought might work with the tree stamp so I just made it, I wanted to get at least 5 cards done in a month but I only managed these 4 so far.


I don't know that I have done black on a Christmas card before but this black on black print of paper was pretty and thought would make a nice subtle background for silver embossing, I could only get the embossing to show up with the card on this angle.  I added some silver border stickers and the sentiment.

Inkadinkado - Holiday Silhouettes and Christmas Season stamps embossed w/silver embossing powder
Hot off the press - Jewel border Dazzle stickers

The next two have the same stamp, one done with gold the other with red embossing powders.


Inkadinkado - Holiday Silhouettes stamp embossed w/gold embossing powder
Graphic 45 - Christmas past papers
Martha Stewart - border punch
Simon Says - tiny words Christmas sentiment stamp


Inkadinkado - Holiday Silhouettes stamp embossed w/red embossing powder
Spellbinders - Decorative Labels 8 die
Cardmaking and papercraft sentiment tag
Sequins


Inkadinkado - Holiday Silhouettes and Christmas season stamps embossed in Silver embossing powder
Circle punch with glitter paper for the dots

I truly hope I can keep this up so I am not so rushed before Christmas.

Another cold morning waking up today but another morning with sunshine, so I am happy!
Have a great weekend,

Connie

Thursday, January 24, 2019

Fishing

This is for my other nephew, they were born on the same day 3 years apart. This nephew likes all kinds of fishing, hunting, I have done a lot of hunting and outdoor themed cards so this year I went with fishing, this is another gem I picked up at the yard sale at my scrapbook store.

This is a Thomas Kinkade image. Thankfully it has a full color image on the front of this wood based stamp so I was able to look to it for inspiration on coloring mine.  I did take the red rubber stamp off the base of the wood mount and used it in my Misti to stamp it, thankfully I did because I did need to stamp it a few times.  I colored it with markers


I really liked the way my sunrise came out on this.

Cornish Heritage Farms - Thomas Kinkade, It doesn't get much better Vignette stamp, color w/markers
Crate Paper - Party day paper
Spellbinders - A2 mating basics A, classic rectangle and Labels 29 dies
Gina Marie - Birthday words sentiment stamp
White burlap

The sun came out this morning, they say to enjoy it because it won't last the day, so you can bet I am hanging out around the windows soaking it up as much as I can since it is below freezing outside.

Thanks so much for taking the time to stop by today,

Connie

Wednesday, January 23, 2019

Lakeside

This is another stamp I picked up at the yard sale this past summer, this one is for my nephew who also lives in Michigan, he can dream about this summer's vacation for his birthday :)  I decided not to put a sentiment on the front, but added some photo corners to it and a bit of inking around the edges.  Instead of inking in my clouds with my template I tried to draw them in with my marker, not to sure what I think, maybe I need to go back to my stencil, LOL!


Northwoods Rubber stamps - Sailboat and Lighthouse on Lake stamp, colored w/markers
Spellbinders - A2 Distressed Edges die
Photo corners

Thanks for stopping by today,

Connie

Tuesday, January 22, 2019

Bunch of flowers

I haven't used this die set in quite some time and had a lot of strips that were hanging out of the 6x6 pad of paper I had, so I decided to use them up and create a card and this is what I came up with.


I added a little ink to the ends of the flowers and a bit of stickles to the centers.

WeRmemory keepers - Anthologie paper
Spellbinders - A2 curved borders one  and back to basics tags dies
Elizabeth Crafts designs - Bunch of flowers 4 die
Sizzix - Branch w/leaves die
Stamps of Life - Minis4circles sentiment stamp
Brad

Today is the only day this week we are getting above freezing with our temperature, but it is cloudy and going to rain later today. Hope you are enjoying the day whatever your weather :)

Thanks so much for stopping by today,

Connie

Monday, January 21, 2019

Old Mackinac Point Light

When I saw this stamp at the yard sale at my Stamp store last summer I was all excited, this is one of the light houses in Mackinaw city, Michigan that we go to quite often.  I knew my girlfriend that I grew up with would love this since she also loves Michigan light houses, although this one isn't her favorite I knew she would think it was neat and she did :)


I cut it out with my postcard die, thought that would be perfect, I colored it with markers, using the actual picture to try and get the colors right. 


I don't often see it from this side I see it from the water side since there is a nice walk along the water we always do to get pictures of the bridge that you have seen me share many times.  I went back and I don't see where I have ever shared a picture of the light house, so I will share it now. This is standing with the water to my back so this is the backside of the house.


I googled the company whose name was on the stamp and I couldn't find anything so I think they may not be in business anymore, I wonder how many more lighthouse stamps may be out there :)

Sunnyside Stamps - L110, Old Mackinac point light, colored w/markers
October Afternoon - Seaside papers
Pawsitively Pawsome designs - stitched postage stamp die
Spellbinders - A2 matting basics A die
Our Daily Bread design - mini tags die
Papercraft Inspiration- greetings stamp set
Wink of stella- on water, clouds and windows

So neat to come across something that brings joy to others :)

Hope you are having a good start to your week, we are very cold here, wind chills are terrible but the sun is shinning once again and that makes me very happy :)

Thanks so much for taking the time to stop by,

Connie

Sunday, January 20, 2019

Ink Swipe Technique

One of the gals in my stamp group had a challenge to use a credit card to swipe ink across your card to make interesting backgrounds.  I only tried it on Bristol smooth card stock, they were more adventurous and tried it on watercolor and glossy.

You can google Ink Swipe technique if you want to give it a try, I didn't do something write because I couldn't get long swipes and the card I did manage to do that by continuous adding on to me little swipes looked awful that went into the trash.


We were to use at least 3 inks, and make a card out of at least one of 3 backgrounds we made.
Here are the 3 I made.


Crafters companion - Sheena - Silhouette Grass stamp
Versafine ink with clear embossing powder
Distress Oxides - Tattered Rose, Pumice stone, and Abandoned coral
Hero Arts - All Occasion messages stamp sentiment
Lawn Fawn - Fancy Scalloped Rectangle
Sparkle confetti

I really don't see me trying this technique again but I have seen others have had wonderful results.

Thanks so much for stopping by and have a Blessed Sunday!

Connie


Friday, January 18, 2019

Pink & Grey with Sparkle

Today's card will be in two challenges. The first is the Flower Challenge blog.


The next is The Sisterhood of Crafters and their challenge is to use sparkle.


When I first saw this challenge I thought of this stamp that hadn't seen ink yet, it was just itching to be used :)  I colored with Spectrum noir markers.

For my sparkle I had this silver diamond paper that already had glitter on it, I also added stickles to the center of my flower and I am hoping you can see in this next picture that I added Spectrum Clear sparkle pen to the water in the vase.


I wouldn't normally color like this so I liked the challenge, the flowers really pop.

Penny Black - Rose Bowl stamp, colored w/markers
Memory Box - Stitched Rectangles Layers die
SRM stickers - Happy Birthday set
Stickles - yellow
Spectrum Sparkle pen clear on water in vase
Pink Sheer Ribbon


There are a few more days left in each challenge if you want to play along.
Thanks so much for taking the time to stop by today,

Connie

Thursday, January 17, 2019

Sense of Wonder

My friend loves foxes and I have a few of them in my Cheerful Journey daily coloring calendar, so I chose this one because I loved the sentiment that was on it, I think we all need that no matter our age.
I colored it with pencils this time.  Although markers bleed real easy on these papers I just feel I color better with markers but the images are so tiny you almost have to go with pencils to get in the small areas. I had these 3 scraps left over from this paper pad and when I put them all together I thought it worked pretty well.


Cheerful Journey daily coloring calendar 2018, colored w/pencils
We R Memory keepers - Anthologie papers
Liquid Pearls - Chestnut

Thank you for taking the time to stop by today, Hope you are having a good one,

Connie

Wednesday, January 16, 2019

Miss you

Here are the Miss you cards I made for the Military card drive.

I first started off with the paper, it just said sunflower to me so I made one to go with it. When you die cut the flower the center portion falls out, so I used that for my sentiment below, it fit perfect with the design in the paper.  The embossed image in the middle is part of the die set.  I inked the flower.


Spellbinder - Sunflower set 2
Stamps of Life - minis4circles stamp

The next two cards I used some watercolor background papers that have a design already on them, all you do is color them.  I added some images from my coloring calendars to them.
This first card I used Spectrum Aqua markers to do the water coloring.


Spectrum Noir - Simply Beautiful toppers, colored with Spectrum Aqua markers
Coloring for calm daily coloring calendar - image, colored w/markers
Die Versions - Miss you die cut 3 times and layered


This last one I colored the background using my Distress Oxides.

Spectrum noir = Easy toppers, colored w/Distress Oxides (Background)
Lang, Cheerful Journey daily coloring calendar image - colored w/markers
Pawsitively Pawesome designs - Mini stitched squares die
My Favorite things - Label maker sentiment

Thanks so much for taking the time to stop by today,

Connie

Tuesday, January 15, 2019

More Hearts

When I was getting ready to post this I realized that I am only going to be able to use one of these cards for the military cards because I forgot and used stickles and they asked us not to use any glitter, so that is a real bummer.

I have had these stickers for awhile and in real life they matched this paper perfectly but the camera doesn't see that, ugghh! They are a bit puffy so they have nice dimension on them, but not to thick for mailing.


Romance stickers from $ store
Spellbinders - classic hearts and Lace hearts dies


 I wasn't to impressed with the way the hearts stacked in this die set, they are a little off, so with this one I put the die that I used to cut out the white heart on the backside of the krafty script paper and traced around the outside of the die and hand cut it out to get the layer behind.  I tried stamping the leaves in two different colors but I think the one green may have been a little too light. The paper I used for the heart is textured so stamping on it wasn't all that easy.

GinaK - wreath builder stamp set (leaf and flower stamps)
Colorbok - Rub on sentiment
Stickles Burgundy

In this last card I just loved the gold script in this paper, so I carried that through using gold paper for my leaves die.


You can see how I used the next size up die heart in this one and they just don't frame as nice.

Spellbinders Classic heart dies
Impression Obsession - Layered floral dies set
Hero arts - All Occassion messages stamp sentiment
Stickles - gold flower centers

Working on Miss you cards I will share tomorrow,
Thanks so much for taking the time to stop by,

Connie

Monday, January 14, 2019

Sending Love

One of the girls in the card making group has a son in the military and she provides cards for his unit whenever they are deployed, she asked if we would like to send cards too, and they are asking for Love and Miss you cards, I started with Love.

I have been seeing many from the group and on Pinterest using Washi tape so I went with that. First I cut my card stock to 4 1/4 x 5 1/2 inches, cut out the heart with my die, found a square die that was just a little bigger and cut it out and added my strips of Washi tape to the square and glued it behind my heart and taped my panels down to the card base.

The first one I cut the heart on an angle, wasn't sure how I liked that so the two remaining I went with straight cutting. I cut the sentiments on all of these cards 3 times to give them a little lift.


Spellbinders - classic heart die
Paper studio - Washi tape
Die versions - Sweet die


Tim Holtz - washi tape
Die versions - I love you die
Nuvo Crystal drops - carnation pink


Recollections- Fabric washi tape
Love from the die versions I love you die

I will share tomorrow what I did with the hearts that were cut out of these.

Thanks so much for stopping by today and I hope you have a wonderful week ahead,

Connie

Sunday, January 13, 2019

Same but different

A few of the girls in my group were mentioning that when they make a card they go ahead and just make two, one they were making for someone and one they put in their stash. Although both of these went to someone, I decided to give it a try, I have only done it this once, but we will see if I try it again.

I am not one to make an exact copy unless it is at Christmas time, so one of these went through the mail and the other was hand delivered so I was able to go with a bit more bulk.


I went with a sketch for the design of the cards, I just went opposite ways with the border of flowers. These flowers I found at the Dollar store a few years back, they are very thick and that is why I haven't used many of them.

Cuttlebug - Stylized flowers embossing folder
Flowers from Dollar store
SRM Sticker - Happy Birthday
Prima- Annalee collection paper


Cuttlebug - Birds & Swirls embossing folder
Prima - Annalee collection paper
Spellbinders - Rose Collection paper
Me and my big ideas - clear gems
SRM sticker - Happy birthday


All the papers I used for the flowers and leaves were in my left over basket.

We are still getting snow today but it is coming down very lightly, they said maybe another 1/2 inch, so nothing bad.

Thanks so much for stopping by today,

Connie

Saturday, January 12, 2019

Winter snow storm

Well we did get the snow they had predicted, they said this morning so far we have 10 inches and it is still snowing, possible 1-3 more today with possible sleet this afternoon, that should make a mess even messier.  There were people over on the Missouri side that had to spend the night on the interstate because the conditions were so bad and because of the hills the cars just kept sliding they couldn't get traction, but this morning they have been able to get it cleared again, although the traffic is moving at a crawl because over there it is snowing harder than this side of the Mississippi river.

I took a picture just before posting to show you what it looks like out my back door.


Now to share the card I made for my great nephew, turning 15.


I cut the strip with the numbers and wrote in the reasons he is Awesome, but then the last two wrote Happy Birthday.  I did pop up the awesome tag when I realized it was going to cover up my writing so he could turn the card and still read them.


It is so hard to come up with original cards for all the great nephews I have.

Thanks so much for stopping by today,

Connie

Friday, January 11, 2019

Butterflies

Even though I still have a basket of stamps I haven't used before I still like to go back and use some oldies but goodies.


Doesn't this card just get you excited for spring to come. We are under a winter storm warning, we may get up to 10 inches of snow, with possible freezing rain to start it all off.  It is supposed to be the heavy wet snow so they are warning people to take it easy while shoveling, I am hoping a young man will come to my door and want to make a little extra money :)

Crate Paper - DIY shop paper
Our daily Bread design - Bird and Butterfly stamp set, stamped with Distress oxide bundled sage and clear embossed
Spellbinders - Labels 18 dies
Paper craft inspiration magazine sentiment stamp
Cheery Lynn designs - Alison's ribbons die
Martha Stewart - butterfly punch
Enamel accents - white

Wishing you all a fun and creative weekend,

Connie

Thursday, January 10, 2019

Cherry Thanks

I have a couple more thank you cards to share, this time I used an image from K & co., these images come with sparkle already on them on one side and the other side is plain, I always use the sparkle side and more scraps from my left over basket, I am determined to get that pile down :)


K&co. - Die cut card stack flora and fauna
Lawn Fawn - Big scripty words stamp and dies
Spellbinders - deckled rectangle die
Nuvo crystal drops -  Autumn red

The tag on this next card was given to me by a friend so I am not sure who makes them, but they are cork and canvas, I was a little worried about stamping on the canvas but I think it came out pretty clear.


Paper ?
Tag from friend
Hero Arts - All occasion messages stamp sentiment
Gems

Thanks so much for taking the time to stop by today,

Connie

Wednesday, January 9, 2019

Peace

Our former music leader of our church has lost his Mom, I used a coloring card from Psalms in color, I like these because they all have verses on them and I thought this one was good for a sympathy card.


Christian art gifts - Psalms in color, colored w/markers

We did get a good work out walking in that wind yesterday, and it is still blowing today, yesterday it was in the low 50's today it is in the 30's with windchill in the 20's, I may be finding a workout to do in the house today :)

Thanks so much for taking the time to stop by today,

Connie

Tuesday, January 8, 2019

Little country

I decided to go through my basket of embellishments I have to see if there was anything I could use for thank you's and I came upon these two little packages of embellishments my sister gave me awhile ago, to me they look like they have a country feel to them.

The first I went with a sketch added some jute to them, placed them on some die cuts since I have a pretty busy background.


Paperbilites- Add ons (star, circle, heart)
Spellbinders - classic scalloped square small dies
Jute
David Tutera - sentiment


Next I used one of the bigger ones with a little one added.


Paperbilities - Add ons (heart and circle button)
DCWV - paper
Clearly whimsy stamps - simple sentiments stamp

We are having some high winds today, we may get blown away on our walk today,
Hope you all are well, and thanks for taking the time to stop by :)

Connie

Monday, January 7, 2019

On the Menu

Over at Double D challenge blog the challenge was to use something on the menu.  I went searching through my coloring calendar and found these strawberries to color up.  They are even better dipped in dark chocolate but I didn't color them up that way for this, I was in the need of thank you notes and I was thinking I had a thank you berry much but after coloring this I just couldn't find it.


First I started off by stenciling the background very lightly with ink, I mixed a little water with a blue sparkle pen and took a paint brush and tapped the end to make spatters onto the background, popped up the image and added a few gems.

Coloring for calm daily calendar image, colored w/markers
Crafters workshop, balzer designs - stencil with ink
Hero Arts - all occasion messages sentiment stamp
Gems

Hope your week is off to a great start!
Thanks so much for stopping by,

Connie

Sunday, January 6, 2019

Something you Love

The next challenge was to use an item or image of something you love, well I had a hard time choosing between flowers and birds, really they are a tie for me when it comes to card making, I love them both on a card, so since I couldn't choose, I went to my basket of unused stamps and told myself whichever I come up with first that is the card I will make and this stamp was the first flower one to pop up.


Mama Elephant - botanic hello stamp, colored w/markers
Spellbinders A2 matting basics A die

Next challenge was to use an image starting with the letter "A".  I couldn't come up with something original so I used Animals. When buying this stamp they show a colored version and I thought there was different patterns in the balloon, but when I pulled the stamp out the balloon just had the patchwork lines but no patterns in them, and I guess that is what I liked about it, so I had to add my own patterns.


I added the sky with a stencil and stamped the grass and sponged over it for the ground.

Inky Antics - Balloon kitties, colored w/markers
D.R.S. designs - Easy grass background stamp sponged w/mowed lawn distress ink
Tumbled glass distress ink and homemade cloud stencil for sky

The last challenge was to use two different pattern papers on your card and one stamped image that you color. I used my pattern paper for the sky and ground, both from my scrap basket :) and colored these two to send birthday wishes :)


Mama Elephant - Dos Amigos stamp set, colored w/markers
Poppystamps - Stitched landscape die
Memory Box - flying birds die

That is the end of the challenges for that group, I will have a little time to rest before my stamp group has there challenge week, I am just so thankful that the stamp group does there challenges over a weeks time :)

Have a very blessed Sunday,

Connie