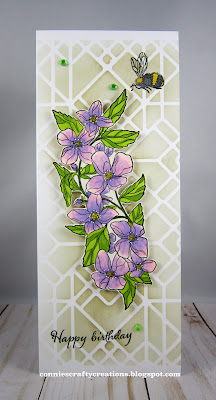
It was my turn to share a challenge in our group and I decided to go with Jennifer McGuire's Bridge card tutorial . I like trying new designs and this looked like a fun one. She did a couple sizes I went with her second card size so it would fit in an A2 size envelope. It folds up flat and when you take it out of the envelope it pops up and stays together.
I used a leaf die that I cut twice so that it would have a little more thickness to span the card and not be too flimsy. I also cut the bird die twice too.
- Spellbinders - Mosaic vine die cut twice and layered
- Cheery Lynn designs - Feathered Friends die cut twice
- Fiskars - Stamped sentiment
- Enamel Accents - Black for bird's eye
- K & co. - Blue Awning Paper
I thought of another idea so I ended up making another one, this time a little more masculine. I used all paper from the paper pack, just fussy cut the leaves from the paper and added some cardstock to the back to make it stiffer, and cut the sentiment from the paper and also added a couple pieces of cardstock behind that to make it stronger, so there is a bridge at the top and bottom.
- Heartfelt Creations - Woodsy Wonderland Collection papers
Here are some pictures of the scoring and folding I did to give you more of idea how it goes together. If you decide to make one just be careful when you are adding your glue that you do not get it on the middle section or you will glue it together and it won't pop up for dimension.
Cut paper at 10 3/4 x 5 1/2 inches. Score at 1 1/4, 2 /14 and 3 1/4 from each long end.
Fold the 3 1/4 inch score toward the center of the card on both sides and then accordion fold the rest until it looks like this.
If I am not clear enough watching the video link at the top is your best bet :)
Thanks so much for taking the time to stop by and hope you have a great week ahead!
Connie


